An automatic garage door opener is one of those everyday conveniences you don’t think twice about—until it stops working. And when the sensors start acting up, that seamless automation can quickly turn into a frustrating mystery. Fortunately, learning how to fix a garage door sensor is easier than you might think.
Signs your garage door sensor needs to be reset
Your garage door sensors are important (and importantly sensitive!), making sure nothing (and no one) gets crushed when the door comes down. But when they go haywire, they can bring your entire garage door system to a frustrating standstill. Here’s how to tell if a reset is in order:
- The door starts to close but then reverses, or won’t close at all. If your garage door keeps changing its mind about closing, the sensors might not be aligned properly or could be picking up false obstructions.
- The sensor lights are flickering or the garage door sensor has no light at all. Most sensors have indicator lights—if they’re blinking erratically or the garage door sensors are not lighting up, there’s likely a connection or alignment issue.
- The door reverses suddenly, as if something is blocking it. Even when the path is clear, misaligned or dirty sensors can trick the system into thinking there’s an obstruction.
- You hear unusual noises or notice the motor straining. If the opener sounds like it’s working harder than usual, but the door isn’t responding properly, sensor issues could be interfering with the system.
- The manual override works, but the automatic function doesn’t. If you can open and close the door manually but the automatic opener refuses to cooperate, the sensors could be the missing link.
Luckily, if you’re noticing any of these issues, a quick reset might be all it takes to get things back on track.
How to reset your garage door sensor
Learning how to repair your garage door sensors isn’t as complicated as many expect. Follow these simple steps to get your system back in sync:
- Safety first. Before doing anything, disconnect the garage door opener from power. This prevents accidental activation while you work. Also, make sure there’s nothing blocking the door’s path.
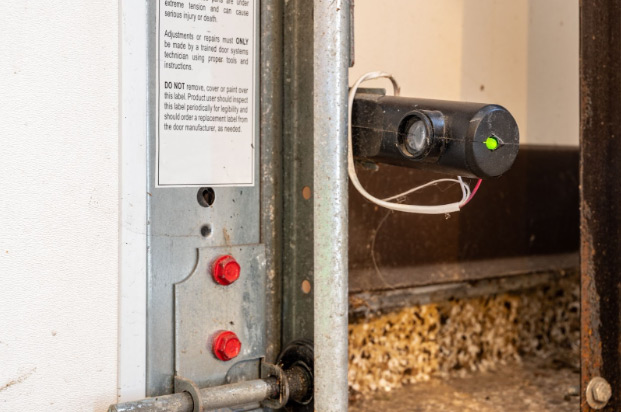
- Find the sensors. Look at the bottom of your garage door tracks on each side—those small, box-like devices near the ground are your safety sensors.
- Clean the sensor lenses. Dust, cobwebs, and dirt can interfere with the sensors’ ability to communicate. Use a dry cloth to gently wipe the lenses clean.
- Align the sensors. Both sensors need to face each other directly to work properly. Adjust their position until the indicator lights glow steadily, which means they’re in sync.
- Secure the sensors in place. If they’re loose or misaligned, tighten the brackets or screws to keep them firmly positioned.
- Reconnect power and test. Plug the opener back in and try closing the door. If it moves smoothly without reversing, your sensors are back in business!
If your garage door is still acting up after these steps, there may be a deeper issue with the wiring or opener. In that case, it might be time to call in a pro. But in most cases, a simple reset is all it takes to get your garage door working like new again!
Protect your home inside and out
Learning how to repair a garage door sensor might seem intimidating at first, but as you’ve seen, a simple reset is often all it takes to get things back on track. That said, it can be important to have someone in your corner when household systems and appliances are on the fritz. That’s where an HSA℠ home warranty plan comes in handy. HSA has you covered—whether it’s tackling big repairs you can’t handle alone or offering expert tips for the ones you can.